Saturday, November 14, 2026

Over the Top

 It's been over a year since my last post, and life happens while you're not looking. My brother Dave passed away about a year and a half ago. Like all my brothers (I had four), Dave was a car guy and owned several Bugeyes over the years.   We probably had a half dozen Bugyeyes among us. Here is Dave's in the pole barn with the rest of his collection.


You'll notice a 1949 GMC pickup and a 1967 Camaro in the background. He also had a Big Healey and an MGB GT, along with Dad's 1956 Chevy and late model Buick and Chevy Silverado daily drivers. This photo was taken while the Bugeye was still in primer so it looks a bit rough, but he had a nice grey paint job done soon after. Dave left the Bugeye to one of my other brothers who is working on its restoration.

Now focus on the hardtop. When I bought my Sprites in 1986, this hardtop came along with them. It was a factory piece but bare, no clips, no hardware, no rubber. At that time, those bits were made of pure unobtainium. After I got the Bugeye on the road in 1992, Dave came down with a trailer to haul off my rust bucket '65 Sprite parts car and took the hardtop along with it. He improvised windshield clips from Jeep hood latches and I don't know where he found the rubber. Long story short, the brother who inherited the Bugeye asked me if I wanted the hardtop since it was mine to begin with and he couldn't get in or out with it in place. I said yes, even though I don't know if I would have similar entry constraints. So six months later my son was visiting and brought the hardtop back in his minivan. 

The hardware and rubber is now available through Bugeyeguys so it looks like new! I had Exclusively Classics of Cedar Park, TX do the installation and am very pleased with the results.

A dry run tells me I need to do some fiddling with the fit - loosen the windshield mounts and rear hard top tie downs. I love the look and hope I can fold myself enough to get in and out.


Monday, October 20, 2025

On the Road Again


 It's been a long time coming, but today's the day to play some Willie Nelson and celebrate the return of eBugeye. 


This is the first run after two years of rehab (both the car and me) since being rammed by an 18 wheeler. Much of the repair process has been documented in previous posts, but I need to share the most recent adventures.


Not the actual cable
After the eBugeye was delivered to my garage for final wiring, I committed an unforgivable, unfortunate, bone-headed brain fart, so we had to drop the rear battery box for servicing. Here's why: to measure the high voltage cables to connect with the front pack, I had the notion to connect a single cable between the poles of the Anderson Connector, then trim each side to the right length to mate with the cables from the front pack. Brilliant, right? WRONG!  I had just created a "suicide cable". 

BANG! Sparks flew and some of the magic smoke escaped. The Anderson connector melted. I didn't suffer any injuries, except for the humiliation of knowing that was maybe the dumbest thing I'd ever done and I certainly knew better!

The good news is the fuse did its job, but not before I fried two of the battery cells. My friends at EVTV still had two new CALB CA100FI cells in stock, so we dropped the pack to replace them.

While the pack was out, I reconfigured the platform to put the fuse up front where it could be replaced more easily if this were ever to happen again.

Rear pack ready to raise into the boot floor.


Rear pack assembly in place in the boot.


While all this was happening, I added some convenience and safety items:

HV Maintenance switch and 12v circuit breaker


Charge indicator light and USB port

Interior light


Finally, I installed a horn reconditioning kit from Bugeyeguys so the horn button on the steering wheel beeps for the first time. Next steps are interior finish and mount the Thunderstruck BMS Display. Hard to believe this project is nearing completion.

Monday, July 7, 2025

NACS Part Deux

 Due to an unforgivable, unfortunate, bone-headed brain fart, we had to drop the rear battery box for servicing. More about that in a future post. While the battery box was out, I took the open access to the rear compartment to good advantage revising the mount system for the charge port.

I was pleased with the NACS charge port under the Aston-Martin flip-up gas cap, but not so happy with the attachment. I had used a rubber hose and clamp to mount the underside of the port which made it squishy and allowed for rotation of both the port itself and the cap.

Thinking about a better way to affix the port, I refused to do anything like drilling mounting holes in the now pristine rear body work. It had to be something invisible but secure and able to withstand the inevitable vibration and shock of regular road use.

Being an around-the-house handyman, I remembered something that bordered on magic: the lowly Garbage Disposal!

Hanging under the sink, solid and secure, heavy and often unbalanced, giving years of trouble free service, what's the secret?

The mount uses screw pressure to separate the sink flange from the disposal collar. No holes, no adhesive, no fuss, no bother. Tried and true in every kitchen sink in the civilized world.

Adapting the mount to the NACS charge port was really pretty straight forward. The NACS port supported by the ledge in the gas cap served as the upper flange.

The lower cable retainer would act as the disposal collar, but how to make that work with the mount? 

Cut a round piece of scrap 1/4" plywood to fit the lower disposal mount. 


Cut out the rounded trapezoid to snugly match the outer NACS tube.

Put all together we have a clean and compact mount for the NACS charge port.


Now solid and secure, it feels like it was designed by a pro. A pro plumber, that is.


Tuesday, June 3, 2025

Back Home Again

 Now that the MG has moved on to its new home, I have space for the eBugeye.


It was delivered by Leander Towing who did a very courteous and professional job of backing it right into place in my garage.

Now that Robert Juarez of Pro Automotive and Body has worked his magic, it's time for me to finish the high voltage cabling and trouble shoot the 12 volt system.

Nearly two years after the accident, we should be back on the road soon.

Thursday, May 22, 2025

The Curtain Comes Down


Ever since it was finished in 2012, the evTD has been a show-stopper. 


Arrival at EVTV Motor Verks
Finished late in the night before departure for Cape Girardeau, MO and EVCCON 2012, arriving in a torrential thunderstorm, and winning a trophy for "Best Paint".

This was an auspicious beginning for its run as a show car. Appearances at EVCCON 2013 and EVCCON 2014 followed with Autocross, Drag Races, Parades, and of course Car Shows.


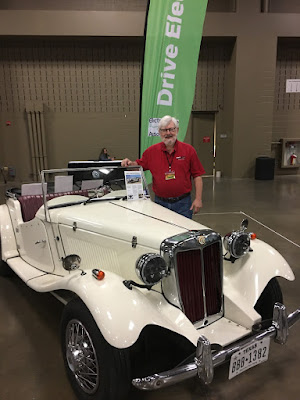
Proud to display at Texas All British Car Days
Cars and Coffee is a perennial show, but the British Invasion of 2013 was a great mingling of Rod & Custom cars with British Classics, so the evTD fit right in. 

Texas All British Car Days (2018, 2019) and IBM Employee Car Shows (2013, 2019) were also regular stops on the fall show circuit 


ALT NRG show in the Palmer Events Center
Also notable were several EV Shows. EV Expo in 2019 and the ALT NRG show in the Palmer Events Center in 2021. 

The Austin Maker Faire was an eclectic event, perfect for a hand crafted specialty car like the evTD.


Most memorable was the Fully Charged Live event at the Circuit of the Americas in 2020.

The "EV Petting Zoo" at Fully Charged Live

Parked next to the evTD, my Porsche was a more sophisticated build and far more useful as an everyday driver, but just not that interesting to the casual observer. The MG is a basic and rudimentary EV conversion, but attracts all kinds of attention with its vintage style and classic good looks.

Which leads us to "Exit Stage Right". After finishing the new battery installation and realizing that I could no longer drive it comfortably (left leg wouldn't cooperate with the clutch pedal), I reopened the marketplace ad and almost immediately the right new owner surfaced. She is a realtor from east Texas who specializes in restored Victorian homes. She kept saying "it's a work of art" and plans to use it as an attraction and photo op for her real estate listings. I'm excited about the evTD's second life and wish them many happy miles down the road ahead.


Farewell old friend.


Friday, May 2, 2025

At Long Last ...


After a three and a half year hibernation the MG took its first tentative excursion under its own power. A major setback along the way was with the full complement of twenty CALB 180 cells standing behind the seat, it was impossible for me to get in and out with the seat so upright. Reconfigured for 12 cells on their side, the seatback rake is now perfect. That yields ~20kWh pack which should be good for around 80 miles of range. Of course, your mileage may vary. The extra eight brand new cells will convey with the car.

Battery cells oriented on their side with the terminals facing forward, protected by the seat back.

This configuration allows for a deeper parcel tray which is more useful as well.

While the seat was out I took the opportunity to install new seat belts which are clean and attractive compared to the old ones.

A year and a half after my accident, I'm still relearning how to use my legs, so getting in and out is awkward at best, and operating the clutch and brake pedals doesn't come naturally yet. 


Time now to give it a shake-down and address some details like programming the BMS display and fuel gauge. Then back on the market in time for lovely Spring evening cruises for some fortunate new owner.


Tuesday, November 5, 2024

New Battery Pack for the MG

Much to report since my last update. I have officially "graduated" from physical therapy, so am spending more time working in the garage. I still tire easily and take frequent breaks, but I'm getting some things accomplished. The Bugeye is basically done save for some wiring and trouble shooting, but it's still in residence at Pro Automotive until I clear space in the garage for it. That means getting the MG sold and off to a new home. Here's the Facebook Marketplace listing.

There were a lot of inquiries initially, but it was clear that no one was prepared to take on the remaining project. A test drive would also help, so I'm finishing out the new battery pack installation. I ordered 44 brand new CALB180FI cells from Cycle Charge that happily came with bus bars and bolts. Battery prices have come down considerably, so I can add the costs to my asking price without breaking the bank. That would result in a 25.3kWh pack that should give a little over 100 miles of range. I also ordered a new charger and DC/DC converter from Thunderstruck Motors that were a better match for the new pack voltage.


Crate of 36 cells plus 8 additional
Crate nicely packaged


Twenty cells fit perfectly on the rear platform


New Charger and DC/DC Converter mounted to forward battery end cap.


Twenty one cells fit the forward platform with room for the end cap components. The three remaining cells mount under the forward control board.

The forward board has the NACS (Tesla) charge port, charge LED indicator, Thunderstruck Charge and BMS controllers, and the maintenance switch. The gap between the cells allows for the switch wiring. Yet to be placed are the 12 volt battery and a couple of relays. 

Jack Rickard always said that 80% of the effort in converting a car to an EV lies in planning the battery and component layout. The remaining 20% on this project will entail building the battery container boxes and the high voltage, BMS, and 12 volt wiring. Stay tuned as we finish this up.