 Man, has it been hot here in Austin. With highs approaching 110F, temperatures in the garage are in the low 100's during the day, so working on the Porsche has been a sweaty endeavor. We installed the Benling Air Conditioning compressor in the car early in the build process, but there were some things that needed to get done before it could be put into service. The car's cooling system, radiator and fans, needed to be uprated and I had to figure out how to mount and wire the controller. So here we are after almost two years on the road, finally ready to put a freon charge in the compressor and enjoy some cooler motoring.
 |
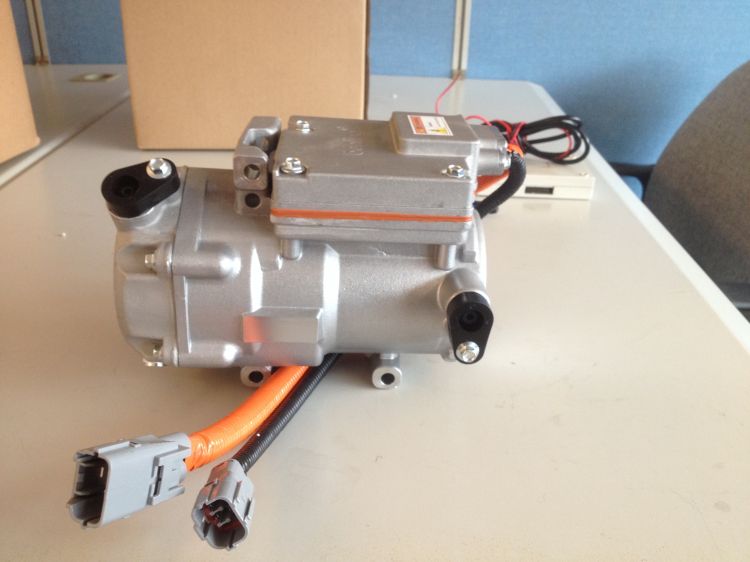
| New compressor in place. |
 |
| New A/C contactor hiding under the two red cable boots |
Thanks to Jack Rickard and Bill Bayer for shipping my replacement so quickly! This time I may have erred on the side of excess caution, but I completely redesigned the A/C circuit to include a spare contactor I had in a box of stuff and a 400 volt 100 amp diode to prevent any outbound current from the A/C unit. Since the compressor and charger share an input line from the battery pack, both are protected.
 The new compressor also came with the newer design controller which is not quite as ugly as the original. One of the delay factors in bringing the A/C online was my attempt (without success) to use the original dashboard controls to manage the compressor. I hate to chop holes in the dash or otherwise bastardize its classic look, so a suction windshield mount for an iPhone did the trick. I also added an on/off switch to the console in an existing hole to power the compressor contactor and controller simultaneously, keeping them both out of harm's way when not in use.
Speaking of harm's way, I had to crawl deep under the dash to pass the wiring through the firewall. I had fished some of the earlier wiring for the charger and dash gauges through without doing the contortionist routine and noticed that they were dangling in the path of the accelerator pedal mechanism and in some cases showed signs of chafing on the insulation. Another complete rework was in order and that slowed things down considerably. I'm happy with the results and especially happy that this time the compressor fired right up and pushed cold air through the vents as it was meant to.

 With the ambient temperature showing 100 degrees F, at 50% compressor speed (which master mechanic Keith Jordan says shows ideal line pressures) the inside temp dropped to 94.1 in the first minute and 92.8 in the second minute.
The PorschEV is inching towards completion and all-weather everyday use.


